

Being as I think we lost a good thread on this subject during the Great WW Server Crash of Ought Eighteen I thought maybe I'd get another one going because I've seen it come up in a few other threads since we're back up.
If any one else has any advice on doing this or pictures of stuff they've used this process on by all means post them.
OK, here we go......
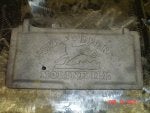
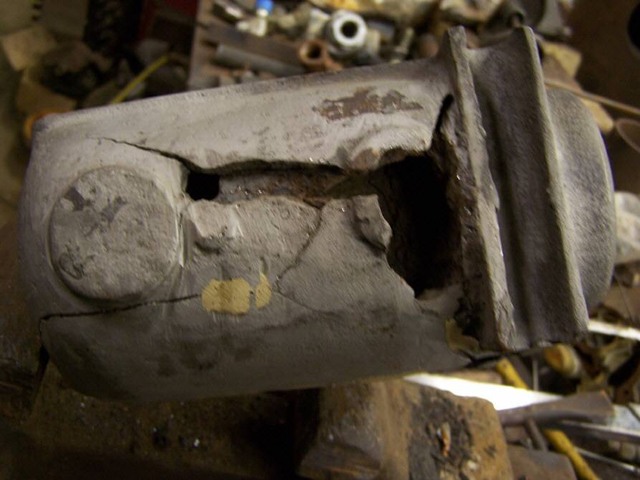
This is an old piece of cast iron I found a couple years back that I've been meaning to do this to for at least the last 2 years. One hinge ear was busted off it and is missing. Thought it might make for a good tutorial about how you would go about fixing something like a broke off cast iron gear tooth . And if any one recognizes (or has a guess) which particular type of old John Deere equipment this goes to I'd sure like to know.
![]()
First step was to take a die grinder and make a cleaning cut on the broke surface where you want the bronze to stick to. This needs to be done with either a die grinder or hand file and not a grinding rock or flapper disc.
![]()
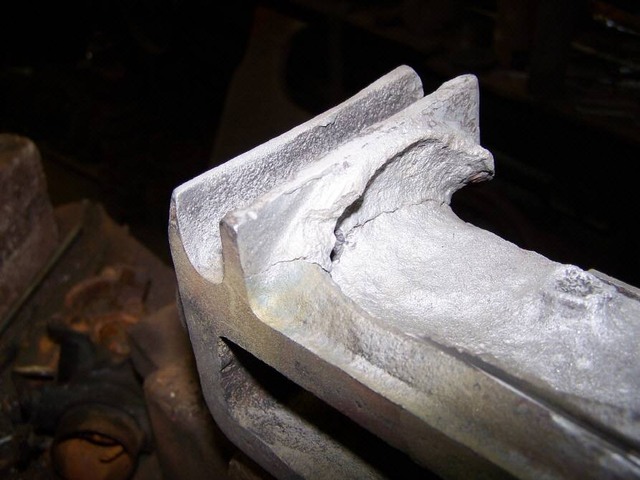
Being as this was not a complex shape and I was just going to be working in one small area on the edge I didn't do much preheat to the whole part other than run the flame over it to take the 20 F. chill it had on it from coming in from outside. Warmed the whole thing up to around 100 F. before zeroing in on the broke surface and bringing that up to red heat and starting to add the bronze.
If this would have been a gear I was trying to build up a missing tooth on I would have heated the whole gear up to 800 to 900 F. before moving in and bringing a smaller area around where I was going to be working up higher (say around 1200 to 1300 F) before moving in even further directly on to the faying surface and bringing it to red heat so it would be hot enough to wet out and accept the bronze. This happens at around 1700F. for the Harris LFB-15 FC rod I was using.
Got this far until the localized heat built up enough to where it was starting to get a way from me and I had to really start flicking the flame on and off the puddle rapidly to get the build up to stay where I was wanting it. The minute or so it took to stop and take this picture let it cool off just enough to where the puddle went back to behaving a lot better. In fact for the whole rest of this I was adding about this much at a time before stopping (and getting the flame off the part) for a minute or two to let the area cool off some before continuing.
![]()
If any one else has any advice on doing this or pictures of stuff they've used this process on by all means post them.
OK, here we go......
This is an old piece of cast iron I found a couple years back that I've been meaning to do this to for at least the last 2 years. One hinge ear was busted off it and is missing. Thought it might make for a good tutorial about how you would go about fixing something like a broke off cast iron gear tooth . And if any one recognizes (or has a guess) which particular type of old John Deere equipment this goes to I'd sure like to know.
First step was to take a die grinder and make a cleaning cut on the broke surface where you want the bronze to stick to. This needs to be done with either a die grinder or hand file and not a grinding rock or flapper disc.

Being as this was not a complex shape and I was just going to be working in one small area on the edge I didn't do much preheat to the whole part other than run the flame over it to take the 20 F. chill it had on it from coming in from outside. Warmed the whole thing up to around 100 F. before zeroing in on the broke surface and bringing that up to red heat and starting to add the bronze.
If this would have been a gear I was trying to build up a missing tooth on I would have heated the whole gear up to 800 to 900 F. before moving in and bringing a smaller area around where I was going to be working up higher (say around 1200 to 1300 F) before moving in even further directly on to the faying surface and bringing it to red heat so it would be hot enough to wet out and accept the bronze. This happens at around 1700F. for the Harris LFB-15 FC rod I was using.
Got this far until the localized heat built up enough to where it was starting to get a way from me and I had to really start flicking the flame on and off the puddle rapidly to get the build up to stay where I was wanting it. The minute or so it took to stop and take this picture let it cool off just enough to where the puddle went back to behaving a lot better. In fact for the whole rest of this I was adding about this much at a time before stopping (and getting the flame off the part) for a minute or two to let the area cool off some before continuing.


")


