WeldingWeb - Welding Community for pros and enthusiasts banner

Bronze Brazing Cast Iron

32K views 90 replies 23 participants last post by  Hobbytime  
#1 · (Edited)
Being as I think we lost a good thread on this subject during the Great WW Server Crash of Ought Eighteen I thought maybe I'd get another one going because I've seen it come up in a few other threads since we're back up.

If any one else has any advice on doing this or pictures of stuff they've used this process on by all means post them.

OK, here we go......

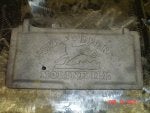
This is an old piece of cast iron I found a couple years back that I've been meaning to do this to for at least the last 2 years. One hinge ear was busted off it and is missing. Thought it might make for a good tutorial about how you would go about fixing something like a broke off cast iron gear tooth . And if any one recognizes (or has a guess) which particular type of old John Deere equipment this goes to I'd sure like to know.


First step was to take a die grinder and make a cleaning cut on the broke surface where you want the bronze to stick to. This needs to be done with either a die grinder or hand file and not a grinding rock or flapper disc.


Being as this was not a complex shape and I was just going to be working in one small area on the edge I didn't do much preheat to the whole part other than run the flame over it to take the 20 F. chill it had on it from coming in from outside. Warmed the whole thing up to around 100 F. before zeroing in on the broke surface and bringing that up to red heat and starting to add the bronze.

If this would have been a gear I was trying to build up a missing tooth on I would have heated the whole gear up to 800 to 900 F. before moving in and bringing a smaller area around where I was going to be working up higher (say around 1200 to 1300 F) before moving in even further directly on to the faying surface and bringing it to red heat so it would be hot enough to wet out and accept the bronze. This happens at around 1700F. for the Harris LFB-15 FC rod I was using.

Got this far until the localized heat built up enough to where it was starting to get a way from me and I had to really start flicking the flame on and off the puddle rapidly to get the build up to stay where I was wanting it. The minute or so it took to stop and take this picture let it cool off just enough to where the puddle went back to behaving a lot better. In fact for the whole rest of this I was adding about this much at a time before stopping (and getting the flame off the part) for a minute or two to let the area cool off some before continuing.

 
#2 · (Edited)
Continuing on....

Just kept building a pad straight up. This picture was taken at one of those points where I was letting things cool back off at bit. I was using the good ear still on it as a visual aid to eyeball against to make sure I was getting the build up where it needed to be. At this point it was still looking like I didn't have quite enough on there yet so I put a few more beads worth on top of what you see in the picture.


After I thought I had enough on in that direction I flipped it around so I could start building out a pad that would be the main body of the ear. Where ever possible you flip the part around so you're working in the flat position. It's not that you can't do it out of position it's more because it takes a lot longer (and requires more finicky heat control by flicking the flame on and off the puddle faster) because you can't put down as thick of layers with out them running off from where you want them to stay.


This is a little further on in building up a rectangular section up off of what you see in the previous picture. Again this picture was taken at one of those points where I thought it best to let things cool back off at bit.


And while it was cooling off some I took the opportunity to eyeball it (against the good ear) from this direction and saw where that other ear had some lean to the left and that I didn't have enough on that side (especially up toward the top corner) yet.


So to make it easier I flipped in around again to this position (the one I started off in) to get some more on that side and corner. This pictures also shows a little better where I'm still needing to get some build up.

 
#3 ·
Another 5 minutes or so and I had what I thought was enough on in that area.

View attachment 1683678

Getting down close to where I'm starting to think I've got it and am using a straight edge to help make sure.

View attachment 1683679

Saw one place on the inside where it looked a little low (especially in close to the cast where I was going to be wanting to end up with a nice smooth radius) so I flipped it around again and puddled a little more on in that area. What you see in this picture is where I called it as being done.

View attachment 1683680
 
#13 · (Edited)
Looks like the forum software screwed with me again on my pictures and they turned to invalid attachments. Let me try getting them in there again where they'll stay....

Another 5 minutes or so and I had what I thought was enough on in that area.


Getting down close to where I'm starting to think I've got it and am using a straight edge to help make sure.


Saw one place on the inside where it looked a little low (especially in close to the cast where I was going to be wanting to end up with a nice smooth radius) so I flipped it around again and puddled a little more on in that area. What you see in this picture is where I called it as being done.

 
#4 · (Edited)
Didn't have a clock with me to keep an accurate account but I'm guessing from taking the die grinder to it to what you see in that last picture was close to 45 minutes. It took just shy of 3, 36" pieces of 3/32" diameter Harris LFB-15FC filler rod to do it. Was using a 2-W-1 Victor tip mostly turned down as low as I could get it with out it wanting it to "pop".

When I was done I left it lay there on the warm table for around a half hour to cool off while I worked on something else. Then once it was back to room temperature (where I could handle it comfortably with thin gloves on) I used a center punch to peck around on it to get the bulk of the remaining flux to chip off before giving it a once over with a wire wheel on a 4.5" grinder to shine it up.


View attachment 1683682

As far as carving out a new ear from that build up (that hopefully will closely resemble the other one) I figured that would best be a project for another day. At this point though I'm estimating that it will take me at least an hour to whittle it out using some combination of my die grinder, 4.5" grinder and some hand files.
 
#8 ·
Yeah, I also tend to err on the side of getting more than actually needed on rather than run the risk of ending up with a low spot you have to go back and put more on. It's not so bad when I'm the one doing the re profiling but I've done a fair amount of this kind of thing where after I've done the build up I'm done with it and the customer takes the part back and does that themselves. I find it a little embaressing to have some one have to bring something back and tell me I "missed a spot".
 
#9 ·
That looks really good.

I was able to get better heat control when I switched to a #2 tip (Harris). Was so pleased with it, that I've ordered some even smaller ones. Just enough to melt the bronze on its face,, and allow you to get a small puddle going........instead of heating the Bejesus out of everything.
 
#11 ·
Well, you know if you're the kind of person that's always looking for the easy way I guess you could have gone that route.

But seriously....

Mostly I did it the way I did just to show how that kind of thing could get done. It was more about doing a Bronze Brazing tutorial than making an economical repair of some kind. But you're right in that there's some point where if your missing piece gets beyond so big it would make more sense to make a replacement piece out of steel and braze it on.

On the other end of that spectrum though... there is a point where even if the customer has the broke off piece it can be of such a small size that it's not worth messing around with to try and put back on but is just quicker and more economical to build up the area and reshape.
 
#17 ·
As an example of what I was saying in post #11 about a piece being so small that it's not worth the hassle of trying to put back on...

If just the end of an ear like this was broke off something (like where I've got the red line) I wouldn't try and put it back on even if the customer had it (which only about half the time they seem to). A little tab or ear end broke off (usually right thru a bolt hole) has been a fairly common type of cast iron repair for me over the years. The hardest part of trying to put a little piece back on is finding a way to accurately locate it and then securely hold it there while you get it hot and make the braze. I just came to the conclusion after trying to do it once (or twice) years ago that it just wasn't worth the aggravation and that I could get a better repair (both in looks and strength) with less dick'n around by throwing the little end piece in the scrap bin and just padding up the area for reshaping and re-drilling.

View attachment 1683703
 
#20 ·
The graphite plates,which come in different thickness, are easy to cut and shape. They are the same composition as the inside of a coated air arc carbon. By clamping them on the back of a hole you can easily fill it, since the weld doesn't adhere to it. I used them for building up sprockets on a large drag chain. You cut the plates to match the profile you want. Clamping one on each side of the sprocket sets your build up profile. This provides a dam and an indicator for where and how much weld metal is needed. They are a little pricey and hard to find but work outstanding in that application. I believe Arc-air brand sells them.
 
#23 ·
View attachment 1683729 Picture of what your lid is off of.
Good find. I'd kind of been assuming that at one time JD made some kind of wood stove and that it was a door off of it. I never could track down any pictures of any old stoves that JD might have made though. Now I kind of know why.

Do you (or any one else) know what the piece of equipment in that picture is called? That way I could google up some more pictures.

One thing I noticed though is that while the one in that picture is real similar to the one I have it's not the exact same. The one in the picture has the hinge ears on the bottom edge while the ones on mine come off the top.
 
#24 ·
Yofish,

That wasn't any kind of official fix for any body that plans on putting it back in service (all though I'm sure it would fine for doing so with). That was just what I thought was a cool old piece of found cast that I thought would make for some good shelf or wall bling. After I get the ear whittled back out I'll probably rattle can it JD Green. Might even get fully carried away and get some yellow and a small paint brush and do the top raised areas of the deer and the lettering. Most likely will end up on the wall as a companion piece to my JD themed feng shui mirror.

 
#26 ·
shorts,

No Amish around here that I know of but we've got more than our fair share of Hutterites. Unlike the Amish though the Hoots don't have any problem with using modern technology to help them get their farming done.

It kind of fits that it was from older actual "horse power" technology piece of equipment because close by where I found it I also found an old single bottom horse drawn plow. Also found quite a few sickle bars but I'm pretty sure they went to more modern tractor driven equipment. But I could be wrong about that.

Thanks for your input.
 
#27 ·
Moving on to another cast iron hinge ear repair. This one actually was a paying job for a customer.

One thing that happens quite a bit on cast repairs is that the surrounding geometry of where it's broke doesn't lend it's self very well to getting things clamped up so there held accurately in the correct position before you start brazing. I probably wasted 15 minutes (or more) try to puzzle out how to do it on this repair. Was starting to get some what frustrated with it when; out of no where, one of the welding gods whispered in my ear.

The broke surfaces were doing a good job of locating the piece back on like it needed to be so by holding the broke part on with one hand I used the mig gun in the other to get a spot weld on. The first time I didn't make a big enough "tack" and it broke back off as soon as I tried to take the die grinder to it to cut a groove. Held it back in place and put a more substantial one on the second time.

That held it good enough to allow me to cut some groove along the portion of the break to the left (on top) and get I layer of bronze in it to really pin it in place well. After that I ground that tack off and cut a groove in that part of the break and brazed it up.

That grey rod is a piece of 5/32 5P stick rod (pretty much the first thing I found that fit the hole size good) I was using to help insure I had the holes lined up. I left that in those holes the whole time I was working on it and every now and then I'd check to see it would still turn and slide to help me be sure I wasn't pulling things out of alignment.

 
#28 · (Edited)
Another thing I do when ever I've got access to both sides of the break is work it from both sides. I'll start out cutting a groove half to two thirds deep on one side and put a layer (or two, depending on the parts thickness) of braze in it before flipping it over and cutting a groove down into it until I can see I'm getting into my braze metal from the first side. Then braze it all the way up before flipping it back over and finish filling the first side up.

One of the good advantages to using bronze brazing to fix cast iron is that the solidifying bronze bead does not act to pull things out of alignment like a solidifying arc weld bead would. In that regard it is highly forgiving. I still try an alternate side to side some when filling deeper grooves on thicker sections though. Mostly just so as not to tempt fate. The few things I can recall that didn't end up as best they could have alignment wise weren't from the bronze pulling on it but more because I didn't pay enough attention to having things lined up just right before I started brazing.


That yellow line you see on the picture just shows another of those situations were if that was all that was broke off I would never have tried to put the piece back on but rather just done a build up, reshape and re-drill.

Also you can see down in that groove a place where I got a little carried away with the die grinder and left a hole. That's not any kind of a problem like it would be if you were going to be stick welding in that groove with nickel rod. The bronze will float across that hole and fill it up with no problem.
 
#29 ·
Thanks for this thread, I am currently honing my brazing skills. I've burned up a lot of bronze rod the last three weeks fixing intentionally broke cast iron pipe and cheap skillets. I got an exhaust manifold from a buddy but I couldn't crack it or bust it so I cut long slots in it with a zip disc then vee'd them out with a burr and brazed them up. Maybe I'll try busting off a mounting ear and brazing it back on.
 
#32 · (Edited)
bigb,

IIRC, you're one of the people that had a thread going on this asking question that got lost in the server crash. You should get some pictures up of your results practicing on that skillet. I've got an old skillet here I might play around on next week to show some things.

In the mean time....

Another odd shaped thing that I used the broke surfaces on as an alignment guide for getting it back together right. Being as cast iron has low ductility and usually just snaps before stretching any you can kind of count on it for realignment purposes.


Put a little bevel in two opposite place (there's a spot just like you see in the picture 180 degrees around on the back side of it) I could get some bronze on to hold it while still preserving most of the broke surfaces to use to line it back up on its self. Put 3/4" (or so) of bronze in those two spots to pin it in place before letting it cool off and grooving out the rest of it with the die grinder. This is also an example of a repair where you can't get to both sides. In those situations I just grind my groove as deep as I can with out going all the way thru.

Held like this in the vice it was just gravity holding things in place while I put the "tacks" on.


Attachments

#35 ·
I really like that pre flux coated stuff myself. And while it often times gives you more flux than you really need I just like the convenience factor of not having to stopping regularly to heat the rod and dip it in the flux. If you're doing something like building up a pad like I started this thread with the excess just runs off down the sides. Occasionally when down in a deeper, steep sided groove to much of it will start building up and interfere with the puddle flowing where I'm wanting it to go but when I see that starting to happen I lay the rod on the table and tap most of it off with a hammer so I'm not adding more of it.

 
#33 ·
This is a failed attempt at using nickel rod to fix a piece of cast iron I came across while walking around an old equipment museum. Oh man it was ugly. Besides not ending up very flat and true it had small cracks in the HAZ every where. It even had a few transverse cracks across the weld. You would have never wanted to put this back in service. It's the "front door" off an antique steam tractor. It's to bad it got buggered up because I'm sure it was worth a few $.

I wouldn't mind some one bringing some thing like that to me to fix because I'm pretty confident I could get a good repair on it with bronze brazing. That looks to me to be around a 4 to 6 hour job.

 
#34 ·
ht; it's all about using the correct filler for the job. someone at work brought in a decorative park bench support end that was broken in a few places. once i torched off the fake patina finish and beveled all the broken pieces,fit and clamped them down to the bench i got a good repair using a couple flux coated brazing rods. using nickel rods would have been cost prohibitive and wouldn't have made a better crack free repair.
 
#36 ·
A dutch oven lid ? V it a little and put some coal in the dutch oven. Fire it up and let it burn down to hamburger coals. Sit the lid , or lid pieces, on it and let it get schmokin' hot. Grab a torch with about a #2 or 3 and fill it with braze. Come back tomorrow and dress it out. If you don't have torches just hit it with 7018 the same way. Clean it up later or the next day. There's no force, no vibration, no problem.
I take manifolds and other cast car parts to between 700 and 1000 degrees and braze them. Seldom a problem except on really old crap and diesel stuff.I need a hot lye tank but I don't get(nor do I want) enough of that work to justify it.
I used to use carbon tet....prolly why the backhoe has my hole scheduled sooner than estimated..LOL
 
#39 ·
OK HT, I’ll buy in. Actually, I was working on a similar post “pre-crash” and just hadn’t gotten the data posted before the site ran aground. Unfortunately, I had used several references to your’s and other’s posts ,so the links died with the data loss.

I’ll start from the beginning, for those that are not familiar with this process. First, the most recent LWS definition.

AWS BRAZING HANDBOOK

CHAPTER 1—BASICS OF BRAZING
“The term brazing refers, in fact, to a group of processes. The American Welding Society (AWS) defines brazing (B) as a group of joining processes that produce the coalescence of materials by heating them to the brazing temperature in the presence of a brazing filler metal that has a liquidus temperature above 840F (450C) and below the solidus temperature of the base materials. The brazing filler metal is distributed between the closely fitted faying surfaces of the joint by capillary action.(1, 2) The term brazing temperature refers to the temperature to which a material is heated to enable the brazing filler metal to spread and adhere to, or wet, the base metal and form a brazed joint.(3)”
“This definition serves to distinguish brazing from the other joining processes of soldering and welding. Brazing and soldering share many important features, but the term brazing is used to refer to the joining processes performed above 840F (450C), while soldering refers to the joining processes performed below this temperature. Brazing differs from welding in that in brazing the intention is to melt the brazing filler metal, not the base materials. In welding, both the brazing filler metals and the base metals are melted to effect the coalescence of materials.”

1. American Welding Society (AWS) Committee on Definitions, 2001, Standard Welding Terms and Definitions, Including Terms for Adhesive Bonding, Brazing, Soldering, and Thermal Spraying, AWS A3.0:2001, Miami: American Welding Society, p. 5.
2. At the time of the preparation of this chapter, the referenced standards were valid. If a standard is cited without a date of publication, it is understood that the latest edition of the document referred to applies. If a standard is cited with the date of publication, the citation refers to that edition only, and it is understood that any future revisions or amendments to the code or standard are not included; however, as standards undergo frequent revision, the reader is encouraged to consult the most recent edition.
3. American Welding Society (AWS) Committee on Definitions, 2001, Standard Welding Terms and Definitions, Including Terms for Adhesive Bonding, Brazing, Soldering, and Thermal Spraying, AWS A3.0:2001, Miami: American Welding Society, p. 6.
2. Let’s define the process in use.
HT is demonstrating Acetyline/Oxygen torch methods. Other acceptable heat sources are propane/oxygen, Acetyline/air, oven heat, and others. For the sake of simplicity, this discussion should be confined to the A/O process, as it is the more familiar and readily available to most users.

3. Materials.
Flux:
Harris 600 Powdered Flux
http://www.harrisproductsgroup.com/en/Products/Alloys/Brazing/Fluxes/600-Powder-Flux.aspx
Filler:
Harris Low Fuming Bronze
http://www.harrisproductsgroup.com/en/Products/Alloys/Welding/Copper-Alloy/Harris-American-Low-Fuming-Bronze.aspx
Harris Low Fuming Bronze 15
http://www.harrisproductsgroup.com/en/Products/Alloys/Welding/Copper-Alloy/Low-Fuming-Bronze-15-BARE.aspx
Please note that both alloys are available pre-fluxed or bare. HT is demonstrating with the pre-fluxed 15 alloy.
Pre-fluxed rods are coated with an extruded coating of 600 Flux.

Since the process is temperature specific, I’ll go ahead and post the color chart for temperature.


Now that I’ve posted all the technical stuff, we can get on to a more how-to discussion, in future posts.